KaizenStackedImbalance
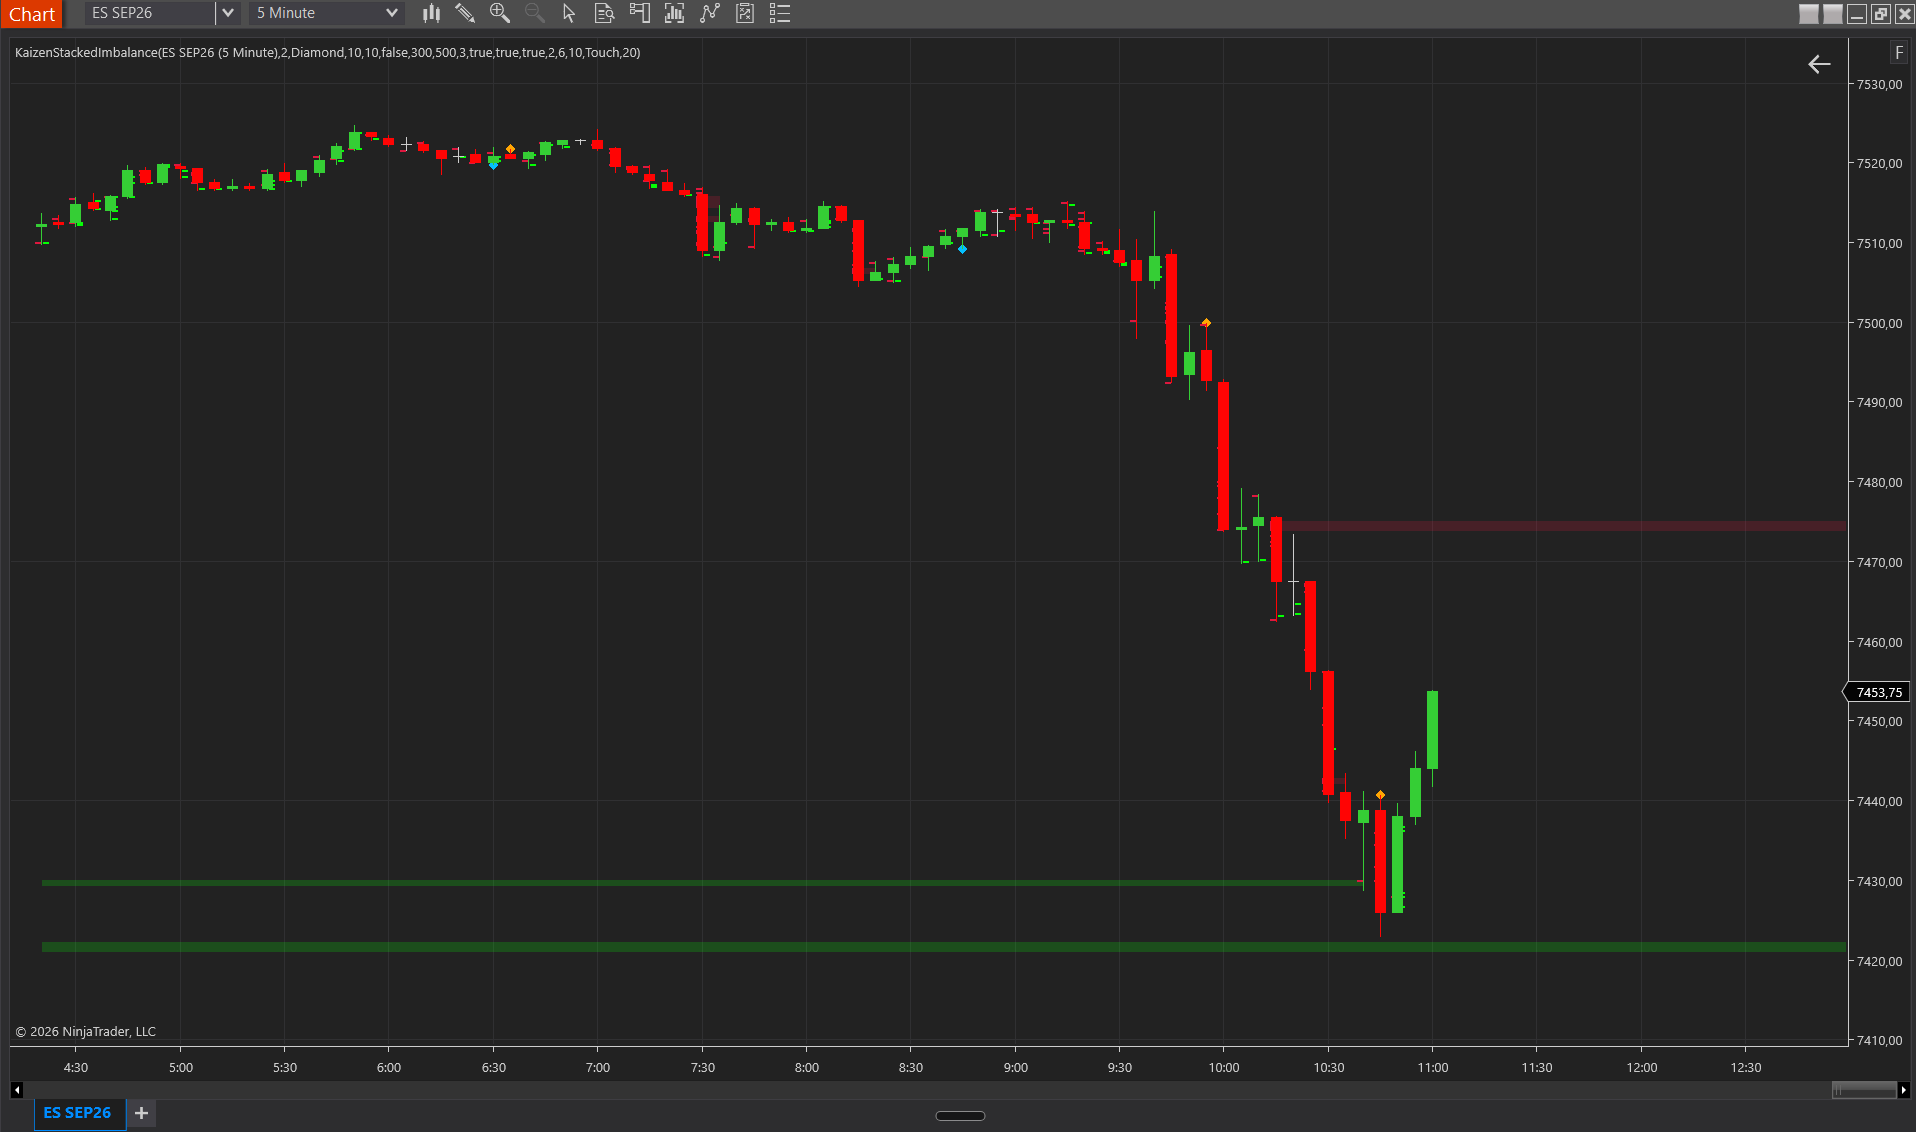
KaizenStackedImbalance detects diagonal bid/ask imbalances, groups three or more in a row into zones and projects them forward as support and resistance on the chart.
Updated: July 1, 2026
KaizenStackedImbalance is the standalone version of the footprint’s stacked-imbalance logic: it detects diagonal bid/ask imbalances (one side ≥ ratio × the other), groups 3 or more consecutive imbalances in the same direction into zones, and projects those zones forward as semi-transparent rectangles until they mitigate. It also detects absorption at the bar extremes (large one-sided volume where price could not continue in that direction).
Interpretation
- Bullish zone (stacked ask-heavy imbalances) = aggressive buyers lifting offers across multiple levels. Acts as support on a retest.
- Bearish zone (stacked bid-heavy imbalances) = aggressive sellers hitting bids. Acts as resistance on a retest.
- The zone persists until price mitigates it via the configured end condition (touch vs. close).
- Absorption marker at a bar extreme = large aggressive volume with no price continuation. A common turning-point signal.
- Min Stack Size controls zone sensitivity: higher values give fewer but stronger zones; lower values catch more (including weaker stacks).
Zone end conditions
- Touch — the zone closes the moment a wick enters it, even a single-tick incursion.
- Close — the zone only closes when a bar’s close price is inside the zone; wicks are ignored.
Touch is more reactive (zones break quickly); Close is more conservative (zones hold through noise).
Settings
Logic
- Imbalance Ratio % — ratio threshold. Default 300 = the dominant side must be 3× the diagonally opposite side.
- Min Stack Size — minimum consecutive imbalances required to form a zone. Default 3.
- Volume Filter — minimum volume on the aggressive side for an imbalance to register. Default 10.
- Ignore Zero Values — if active, zero volume on the opposite side is not treated as an “infinite imbalance”; prevents false marks on gapped levels.
Tick Marks
- Show Tick Marks — draws individual imbalance marks at each detected level (even before they stack into a zone).
- Tick Mark Width / Thickness — visual adjustment for the marks.
Zones
- Show Zones — master toggle for the zone rectangles.
- Zone Opacity % — fill transparency. Default 20 = subtle. Raise it to 40–60 for prominent zones.
- Zone End Condition — Touch or Close (see the note above).
Colors
- Bullish Color — color for bullish imbalances and zones. Default Lime.
- Bearish Color — color for bearish imbalances and zones. Default Crimson.
Absorption
- Show Absorption — enables detection of absorption markers at the bar extremes.
- Absorption Depth (Ticks) — how many ticks from the high/low to scan. Default 2.
- Absorption Min Volume — minimum aggressive-side volume at the extreme for a marker. Default 10.
- Absorption Marker Shape / Size — Diamond / Rectangle / Triangle / Circle, size in px.
- Bullish / Bearish Absorption Color — marker colors.
Performance
- Max Stored Bars — history limit. Default 500.
Requirements
For accurate history, Tick Replay must be enabled (see Installation and getting started).